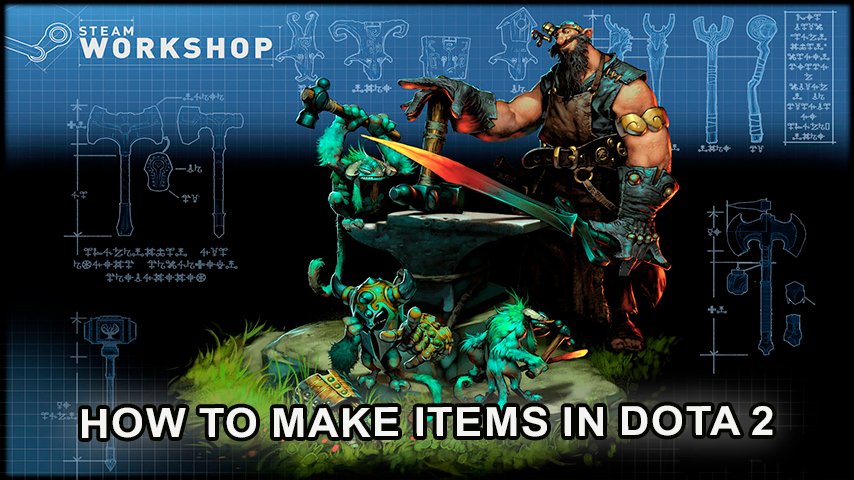
How to make items in Dota 2 so that they will definitely make it into the game
Author: Hawk Live LLC
Last updated:
Dota 2, a game that has become synonymous with competitive e-sports, offers more than just strategic gameplay. At its core, Dota 2 thrives on community involvement, and one of the most significant aspects of this is item creation. These items, ranging from weapons to cosmetics, add depth and personalization to the game. If you've ever been intrigued by the plethora of items available and wondered about their origin, you're in the right place. This guide will demystify the process of item creation, taking you step by step through the Dota 2 Workshop.
Why Create Items for Dota 2?
 Credit: Valve Corporation
The allure of creating items for a game as vast as Dota 2 is multifaceted. Firstly, it's an opportunity to leave a personal mark on a game that has a global audience. Your creation could be used by players from different parts of the world, adding a sense of accomplishment. Moreover, the Dota 2 community is known for its appreciation of creators, often celebrating and promoting outstanding designs. And let's not forget the potential financial rewards. If your item garners enough attention and is added to the Dota 2 store, it can become a source of passive income, with a percentage of sales coming your way.
How to Create an Item in Dota 2 - Step-by-Step
 Credit: Valve Corporation
1. Introduction to Dota 2 Item Creation Workshop:
The Dota 2 Workshop is a unique platform provided by Valve, the developers of Dota 2, that allows artists, designers, and enthusiasts to contribute directly to the game. It serves as a bridge between the game's developers and its vast community, enabling a continuous flow of fresh content and ideas.
Purpose and Significance:
Community Involvement: One of the standout features of Dota 2 is its emphasis on community involvement. The Workshop empowers players to be more than just consumers; they can be contributors, directly influencing the game's aesthetics and feel.
Diverse Content: The Workshop has led to a plethora of items, skins, and cosmetics that players can use. This diversity ensures that Dota 2 remains fresh, with new content regularly added to keep players engaged.
How It Works:
Submission: Artists and creators design items or skins and submit them to the Workshop. These can range from weapons and armor to character skins and other cosmetics.
Community Voting: Once an item is submitted, the Dota 2 community can view and vote on it. Items that receive a significant amount of positive feedback and votes stand a better chance of being noticed by the developers.
Review and Approval: After community vetting, the Dota 2 development team reviews the top items. If they fit the game's aesthetics, lore, and quality standards, they might be added to the game. The creators of these items are often rewarded financially, receiving a percentage of the sales.
Benefits for Creators:
Monetary Rewards: As mentioned, creators receive a share of the profits from the sale of their items in the Dota 2 store.
Recognition: Having an item approved and added to Dota 2 can be a significant boost for budding designers and artists. It offers a platform for their work to be seen and appreciated by millions worldwide.
Skill Development: The process of creating, refining, and submitting items to the Workshop allows creators to hone their skills, receive feedback, and improve.
The Dota 2 Workshop is more than just a submission platform; it's a testament to the game's commitment to its community. By allowing players to contribute, Valve ensures that Dota 2 remains player-centric, continually evolving with the tastes and preferences of its user base. For creators, it's an unparalleled opportunity to showcase talent, earn recognition, and even profit from their passion.
2. Setting Up Your Workspace
Before diving into the creative process of designing items for Dota 2, it's crucial to have a well-organized and efficient workspace. This chapter will guide you through setting up the necessary software and tools, ensuring you have everything you need to bring your designs to life.
Importance of a Proper Workspace:
Efficiency: A well-set workspace minimizes distractions and streamlines the design process, allowing for a smoother workflow.
Quality: With the right tools at your disposal, you can ensure that your designs meet the high standards required by the Dota 2 Workshop.
Creativity: A dedicated workspace can also serve as a creative hub, inspiring you and facilitating the flow of ideas.
Software Installation:
3D Modeling Software:
Choice: Depending on your preference and familiarity, choose a software like Blender, Maya, or ZBrush. Each has its strengths and learning curves.
Installation: Ensure you have the latest version installed, as this will provide you with the most up-to-date tools and features.
Texturing Software:
Choice: Software such as Photoshop or GIMP is essential for creating detailed and vibrant textures for your items.
Installation: As with modeling software, always use the latest version to benefit from the newest features and tools.
Dota 2 Workshop Tools:
Purpose: These tools, provided by Valve, are specifically designed to help creators test and finalize their items for submission to the Dota 2 Workshop.
Installation: Available on the Steam store, ensure you install them to the same directory as your Dota 2 game for seamless integration.
Organizing Your Files:
Dedicated Folders: Create separate folders for different projects. This helps in keeping your designs, textures, and other related files organized.
Backup: Regularly back up your work. Consider using cloud storage or external drives to ensure you never lose progress.
Physical Workspace Setup:
Ergonomics: If you're spending long hours designing, ensure your chair and desk are comfortable. Proper posture can prevent strain and fatigue.
Dual Monitors: Consider using a dual monitor setup. One screen can be used for designing, while the other can display references, tutorials, or the Dota 2 Workshop Tools.
Lighting: Good lighting is essential, especially if you're working with intricate designs. Ensure your workspace is well-lit to reduce eye strain.
Setting up your workspace is a foundational step in your journey as a Dota 2 item creator. With the right tools, software, and environment, you're well-equipped to create items that stand out and resonate with the Dota 2 community. Remember, a comfortable and efficient workspace not only enhances the quality of your work but also makes the design process a more enjoyable experience.
Installing and Launching Tools - Dota 2 Workshop Tools
3. Conceptualizing Your Design
The conceptualization phase is the bedrock of your item creation journey. It's where ideas are born, nurtured, and refined. This chapter delves into the process of brainstorming, sketching, and finalizing the core concept of your Dota 2 item, ensuring it's both unique and fitting for the game's universe.
The Essence of Conceptualization:
Imagination Meets Strategy: While creativity is at the heart of design, understanding the game's mechanics, lore, and aesthetics ensures your item complements Dota 2's universe.
Filling the Gaps: Successful designs often address a need or gap in the game, be it a hero that lacks diverse items or a theme that hasn't been explored.
Research and Inspiration:
Study Existing Items: Before starting, familiarize yourself with items already present in Dota 2. This helps in understanding the game's design language and what resonates with the community.
Dota 2 Lore: Dive into the rich lore of Dota 2. Understanding the backstories of heroes, realms, and conflicts can inspire unique item concepts that feel integral to the game.
Brainstorming and Ideation:
Mind Mapping: Use mind maps to jot down ideas, themes, and motifs. This visual representation can help in connecting dots and coming up with cohesive concepts.
Collaboration: Discussing ideas with fellow designers or Dota 2 enthusiasts can provide fresh perspectives and refine your concept.
Sketching and Visualization:
Rough Sketches: Begin with rough sketches of your item. These don't have to be perfect but should capture the essence of your idea.
Iterations: Based on feedback and further reflection, iterate on your sketches. Refine details, proportions, and elements until you're satisfied.
Digital Mockups: If you're comfortable with digital tools, create a digital mockup of your design. This offers a clearer visualization and can be easily modified.
Feedback and Refinement:
Community Engagement: Share your sketches and concepts with the Dota 2 community on forums, social media, or dedicated platforms. Their feedback can be invaluable.
Self-Critique: Step back and assess your design critically. Does it fit within the Dota 2 universe? Is it functional, aesthetically pleasing, and unique?
Finalizing the Concept:
Narrative Integration: Consider adding a backstory to your item. How did it come into existence? Which hero might it belong to? A compelling narrative can make your item more engaging.
Checklist Review: Before moving to the next phase, ensure your concept aligns with Dota 2's guidelines, aesthetics, and technical requirements.
Conceptualizing your design is a blend of creativity, research, and strategy. It's where your vision for the item takes shape, ready to be transformed into a tangible in-game asset. Remember, a well-thought-out concept not only eases the subsequent design phases but also increases the chances of your item being embraced by the Dota 2 community and, ultimately, the game itself.
4. 3D Modeling
3D modeling is the process of transforming your conceptualized design into a three-dimensional digital representation. It's the heart of item creation, where your sketches and ideas come to life, ready to be integrated into the Dota 2 universe. This chapter will guide you through the intricacies of 3D modeling, ensuring your item is both visually stunning and game-ready.
The Significance of 3D Modeling:
Bringing Ideas to Life: While sketches provide a blueprint, 3D modeling gives depth, perspective, and realism to your design.
Game Integration: A well-modeled item ensures seamless integration into Dota 2, providing players with a realistic and immersive experience.
Choosing the Right Software:
Popular Options: Tools like Blender, Maya, and ZBrush are industry favorites for 3D modeling. Your choice might depend on your familiarity, the software's features, and your specific design needs.
Learning Curve: Each software has its learning curve. Utilize online tutorials, courses, and community forums to master your chosen tool.
Starting the Modeling Process:
Base Mesh Creation: Begin by creating a basic shape or 'mesh' that closely resembles your item's design. This serves as the foundation upon which details will be added.
Refinement: Gradually refine the mesh, adding more vertices, edges, and faces to capture the intricacies of your design.
Detailing and Sculpting:
High-Poly vs. Low-Poly: Initially, you might create a high-poly (detailed) model to capture all details. However, for game integration, a low-poly version, which is less resource-intensive, is often required.
Sculpting: Tools like ZBrush allow for digital sculpting, letting you add intricate details, textures, and patterns to your model, making it more lifelike.
Optimization for Game Integration:
Reducing Polycount: Too many polygons can affect game performance. Use optimization tools to reduce the polycount without compromising on visual quality.
Ensuring Compatibility: Ensure your model aligns with Dota 2's character rigs, especially if it's an item meant for a specific hero.
Texture Mapping:
UV Unwrapping: Before applying textures, the model needs to be 'unwrapped'. This process lays out the 3D model in a 2D space, ensuring textures align correctly.
Texture Application: Once unwrapped, apply your previously created textures to the model. Ensure they fit snugly, with no stretching or distortion.
Rigging (if applicable):
Bone Structure: If your item has moving parts or needs to move with a character, it requires a 'skeleton' or bone structure. This process, known as rigging, ensures the item moves naturally.
Weight Painting: Assign 'weights' to different parts of the model, determining how much each part moves with the assigned bone.
3D modeling is a meticulous and intricate phase in the item creation process. It demands both creativity and technical prowess. However, the reward is seeing your conceptualized design transformed into a tangible, three-dimensional asset, ready to enhance the Dota 2 gaming experience. With patience, practice, and attention to detail, your 3D models can stand out, capturing the essence of your original vision and resonating with the Dota 2 community.
Model Creation - Dota 2 Workshop Tools
5. Texturing Your Model
Texturing is the art of applying surface details to your 3D model, giving it color, patterns, and a realistic appearance. It's akin to painting your sculpture, adding the final touches that bring it to life. This chapter delves deep into the process of texturing, ensuring your Dota 2 item looks as captivating in the game as it does in your imagination.
The Role of Texturing:
Beyond Color: While the primary role of texturing is to add color, it's also about creating depth, realism, and character. Textures can simulate materials (like metal or cloth), show wear and tear, or even convey a backstory.
Game Immersion: Proper texturing enhances the player's immersion, making items feel like an integral part of the Dota 2 universe.
Understanding UV Mapping:
What is UV Mapping?: Before texturing, a 3D model must be 'flattened' onto a 2D space. This process, called UV mapping, ensures that textures align correctly on the model.
Coordination Points: 'U' and 'V' represent the axes of the 2D texture space, similar to 'X' and 'Y' in a 3D space. Proper mapping ensures no texture stretching or misalignment.
Creating Textures:
Source: Textures can be hand-painted, sourced from photographs, or generated using software.
Resolution: Ensure textures are high-resolution for clarity, but also optimized to not overburden the game's performance.
Details Matter: Consider adding details like scratches, rust, or glow to enhance realism and character.
Texture Types:
Diffuse Maps: These are the primary color textures that define the item's basic appearance.
Normal/Bump Maps: Used to simulate surface details like bumps or indentations without adding extra polygons.
Specular Maps: Determine how light interacts with the surface, making parts of the model look shiny or matte.
Emissive Maps: For items with glowing parts, emissive maps dictate which areas emit light.
Applying Textures:
Texture Painting: Some 3D software allows for direct 'painting' onto the model. This can be useful for adding intricate details or blending different textures.
Layering: Just like in traditional painting, textures can be layered to achieve complex effects. For instance, a base metal texture can be overlaid with rust or dirt for an aged look.
Testing and Refinement:
In-Software Preview: Regularly preview your model with textures applied in your 3D software to ensure alignment and desired effects.
In-Game Testing: Using the Dota 2 Workshop Tools, integrate your textured model into the game. This provides a real-world test, ensuring textures appear correctly under various lighting conditions and movements.
Optimization:
Mipmap Creation: These are smaller, optimized versions of your texture that the game uses when the player is at varying distances from the item, ensuring performance isn't compromised.
File Formats: Save textures in formats that retain quality but are also optimized for game use, like .TGA or .PNG.
Texturing is where your 3D model truly comes alive, transforming from a monochrome sculpture into a vibrant, detailed item ready for the Dota 2 world. It's a blend of artistry and technical know-how, requiring patience and attention to detail. When done right, textures can elevate your design, making it stand out in the game and resonate with players. Whether it's the gleam of a sword, the intricate patterns on armor, or the glow of a magical artifact, textures tell a story, adding depth and character to your creation.
Mesh Texturing - Dota 2 Workshop Tools
6. Rigging and Animation (if applicable)
Rigging and animation breathe life into your 3D model, allowing it to move, interact, and express in the dynamic world of Dota 2. While not all items require this step, those that do benefit from added realism and immersion. This chapter delves into the intricacies of rigging and animating your model, ensuring it moves and behaves seamlessly within the game.
The Essence of Rigging:
What is Rigging?: Rigging is the process of creating a 'skeleton' or bone structure for your 3D model. This skeleton dictates how the model moves, ensuring natural and realistic motion.
Why Rig?: Rigging is essential for items that have moving parts or need to adapt to a character's movements, such as a cape that flows or armor that flexes.
Rigging Process:
Bone Creation: Start by placing 'bones' within your model. These bones represent pivot points and joints.
Hierarchy and Parenting: Bones are organized in a hierarchy, where one bone (the parent) controls the movement of another (the child). For instance, a shoulder bone might control an upper arm bone.
Skinning: Once bones are in place, the next step is to bind or 'skin' the model to the skeleton. This ensures that when a bone moves, the associated part of the model moves with it.
Weight Painting: Assign 'weights' to different parts of the model. This determines how much each part deforms or moves with a particular bone. For example, the edge of a cape might have a lighter weight than the center, allowing it to flutter.
Introduction to Animation:
Animating the Rig: Once rigged, the model can be animated by moving the bones, creating a series of poses or 'keyframes'. The software then interpolates between these keyframes, creating smooth motion.
Types of Animation: Depending on the item, you might create idle animations (small movements when a character is still), action animations (like swinging a weapon), or special effect animations (like a glowing rune).
Animation Best Practices:
Natural Motion: Ensure your animations mimic real-world physics. For instance, a heavy weapon should swing slower than a light one.
Looping: For continuous animations, like a hero's idle stance, ensure the start and end frames are seamless, creating a smooth loop.
Optimization: While detailed animations are visually appealing, they can be resource-intensive. Ensure your animations are optimized for game performance.
Testing and Refinement:
In-Software Preview: Regularly preview animations within your 3D software to check for glitches, unnatural movements, or clipping issues.
In-Game Testing: Using the Dota 2 Workshop Tools, test your animated item within the game. This ensures it interacts correctly with heroes, environments, and other game elements.
Collaboration with Sound and Effects:
Synchronized Effects: If your item has special animations, consider coordinating with sound or visual effects. For instance, a sword swing might have a corresponding 'swoosh' sound or a magical glow.
Rigging and animation are the magic that turns a static model into a dynamic, interactive game element. They add depth, character, and realism to your item, enhancing the player's immersion and connection to the game. While the process can be intricate, the result is a lifelike item that moves, reacts, and feels like an integral part of the Dota 2 universe. Whether it's the flutter of a cloak, the swing of a mace, or the intricate dance of a magical staff, rigging and animation bring your creation to life, captivating players and enriching their gaming experience.
Working with IK rigging - Dota 2 Workshop Tools
7. Testing Your Item in Dota 2
Once your item has been modeled, textured, rigged, and animated, the next crucial step is testing it within the Dota 2 environment. This phase ensures that your creation not only looks good in isolation but also functions seamlessly within the game, enhancing the player's experience.
The Importance of Testing:
Functionality: Testing ensures that your item works correctly within the game mechanics, without causing any glitches or issues.
Aesthetics: It's vital to see how your item looks under various in-game lighting conditions, terrains, and alongside other game elements.
Performance: Ensuring that your item doesn't negatively impact the game's performance is crucial for a smooth player experience.
Integration with Dota 2 Workshop Tools:
Importing Your Item: Use the Dota 2 Workshop Tools to import your item into the game. This involves loading your 3D model, textures, rigs, and animations.
Setting Parameters: Define specific parameters for your item, such as which hero it's for, its rarity, or any special effects it might have.
In-Game Testing:
Equipping the Item: Once imported, equip your item to the relevant hero and enter a test match.
Different Scenarios: Test your item under various scenarios:
Different Terrains: See how it looks in different map settings.
Hero Interactions: Ensure there's no clipping or visual glitches when the hero moves, attacks, or uses abilities.
Zoom and Angles: View your item from various camera angles and zoom levels to ensure it looks good from all perspectives.
Performance Impact: Monitor the game's performance (like FPS) to ensure your item doesn't cause any significant drops.
Gathering Feedback:
Internal Testing: If you're part of a design team or group, have peers test your item and provide feedback.
Community Input: Consider sharing your item with the Dota 2 community on forums, social media, or dedicated platforms. Their feedback can be invaluable in spotting issues or suggesting improvements.
Iterative Refinement:
Making Adjustments: Based on feedback and your observations, return to your design tools to make any necessary adjustments. This could involve tweaking textures, modifying animations, or optimizing the model.
Re-testing: After making changes, it's crucial to re-test your item in the game to ensure the adjustments were successful and didn't introduce new issues.
Documentation and Reporting:
Bug Tracking: If you encounter any bugs or issues during testing, document them meticulously. Include details like the nature of the bug, steps to reproduce it, and any potential solutions.
Feedback Compilation: Organize and compile the feedback you've received, categorizing it into areas like aesthetics, functionality, and performance. This structured feedback can guide your refinement process.
Testing your item in Dota 2 is a pivotal phase in the item creation process. It bridges the gap between design and gameplay, ensuring that your creation not only looks appealing but also enriches the in-game experience. Through meticulous testing, gathering feedback, and iterative refinement, you can ensure that your item is ready for the Dota 2 universe, captivating players and seamlessly integrating into the rich tapestry of the game.
8. Preparing for Submission
After designing, refining, and testing your item, the final step before introducing it to the Dota 2 community is the submission process. This chapter will guide you through preparing your item for submission to the Dota 2 Workshop, ensuring it meets all the necessary criteria and stands the best chance of being accepted.
Understanding the Submission Guidelines:
Valve's Criteria: Valve has specific guidelines and criteria for items submitted to the Dota 2 Workshop. Familiarize yourself with these to ensure your item aligns with them.
Technical Requirements: This includes aspects like file formats, polygon count, texture resolutions, and more. Adhering to these ensures your item is optimized for the game.
Aesthetic and Lore Consistency: Your item should fit within the aesthetic and lore of Dota 2. It should complement the game's universe without feeling out of place.
Final Review of Your Item:
Self-Assessment: Before submission, take a step back and critically assess your item. Does it meet the standards you set out with? Does it offer something unique to the Dota 2 community?
Peer Review: If possible, have peers or fellow designers review your item. Fresh eyes can spot issues or areas of improvement that you might have missed.
Creating a Presentation Package:
High-Quality Renders: Provide clear, high-resolution renders of your item from multiple angles. This gives reviewers a comprehensive view of your design.
Backstory and Description: If your item has a backstory or special significance within the Dota 2 lore, include this in your submission. A compelling narrative can make your item more appealing.
Technical Details: Include any relevant technical details, such as polygon count, texture sizes, and any special features like animations or effects.
Submission Process:
Dota 2 Workshop Portal: Head to the Dota 2 Workshop portal on Steam. Here, you'll find tools and interfaces to submit your item.
Filling Out Details: Provide all necessary details about your item, including its name, description, intended hero (if applicable), and any other relevant information.
Uploading Files: Upload all the necessary files, including the 3D model, textures, rigs, animations, and any other assets associated with your item.
Engaging the Community:
Promotion: Consider promoting your item on social media, forums, and other platforms to garner support and feedback from the Dota 2 community.
Feedback Loop: Engage with comments and feedback on your submission. Addressing concerns and being open to suggestions can increase your item's chances of acceptance.
Awaiting Review:
Patience: Once submitted, your item will be reviewed by both the Dota 2 community and Valve's internal team. This process can take time, so patience is key.
Updates and Modifications: Based on feedback and reviews, you might need to make further modifications to your item. Ensure you update your submission accordingly.
Preparing for submission is the culmination of your hard work, creativity, and dedication. It's the bridge between your vision and its potential realization within the Dota 2 universe. By ensuring your item aligns with Valve's guidelines, presenting it effectively, and engaging with the community, you increase its chances of acceptance. Remember, every item in Dota 2 started as an idea, and with meticulous preparation and passion, your creation could soon find its place in this beloved game.
9. Submitting Your Item
 Credit: Valve Corporation
The submission phase is the moment of truth for every Dota 2 item creator. It's when your hard work, creativity, and dedication are presented to both Valve and the Dota 2 community for consideration. This chapter will guide you through the intricacies of the submission process, ensuring you navigate it confidently and effectively.
Understanding the Dota 2 Workshop Platform:
Purpose: The Dota 2 Workshop is Valve's official platform for creators to submit their items for potential inclusion in the game.
Community-Centric: One of the unique aspects of the Workshop is the community's involvement. Players can view, rate, and comment on submissions, influencing which items get selected.
Submission Steps:
Accessing the Workshop: Log into Steam and navigate to the Dota 2 Workshop page. Ensure you have a verified Steam account with a purchase history to submit items.
Starting a New Submission: Click on the 'Submit a New Item' button, which will lead you to the item submission interface.
Item Details:
Name: Provide a unique and catchy name for your item.
Description: Write a concise description, detailing any lore or special features. This is your chance to sell the concept to reviewers and the community.
Category: Select the appropriate category for your item, such as weapon, armor, courier, etc.
Uploading Assets:
3D Model: Upload your item's 3D model in the specified format.
Textures: Include all texture maps, ensuring they adhere to the recommended resolutions.
Additional Assets: If your item has animations, rigs, or special effects, upload these as well.
Preview Images: Provide high-quality preview images of your item. These are the first thing viewers will see, so ensure they're captivating and showcase your item effectively.
Tagging and Metadata: Add relevant tags to help categorize and describe your item. This aids in searchability and ensures it reaches the right audience.
Rights and Agreements: Before finalizing your submission, you'll need to agree to Valve's terms and conditions for Workshop submissions. This typically covers aspects like intellectual property rights and revenue sharing.
Final Review and Submission: Before hitting the submit button, review all provided details and assets one last time. Ensure everything is accurate and presented in the best possible light.
Post-Submission Activities:
Engaging with the Community: Monitor feedback and ratings on your submission. Engage with comments, answer questions, and be open to constructive criticism.
Updates: Based on feedback, you might need to make adjustments or updates to your item. The Workshop allows for revisions to be uploaded without affecting the original submission's ratings or comments.
Promotion: Consider sharing your Workshop submission on social media, forums, and other platforms to garner more visibility and support.
Awaiting Valve's Review:
Evaluation Process: Valve's team will review submissions for both technical and aesthetic criteria. They also consider community feedback and ratings.
Notification: If your item is selected for inclusion in Dota 2, you'll receive a notification from Valve detailing the next steps.
Submitting your item to the Dota 2 Workshop is both exciting and nerve-wracking. It's the culmination of your creative journey, with the potential for your item to become a part of Dota 2's rich universe. By ensuring a meticulous submission, actively engaging with the community, and being open to feedback, you enhance your item's chances of selection. Regardless of the outcome, the process itself is a testament to your passion, skill, and dedication to the world of Dota 2.
Dota 2 Workshop - Submitting Items
Dota 2 Workshop - Account Preparation for Workshop Item Submission
Guide: Uploading content to the Workshop - Steam Community
Conclusion
The realm of Dota 2 item creation is as vast and diverse as the game itself. It's a journey of creativity, technical prowess, and continuous learning. With every design, you not only contribute to the game but also grow as a creator. The challenges are many, but the rewards, from community recognition to financial gains, make it all worthwhile. So, with this guide as your companion, dive into the Dota 2 Workshop and let your creativity shine!